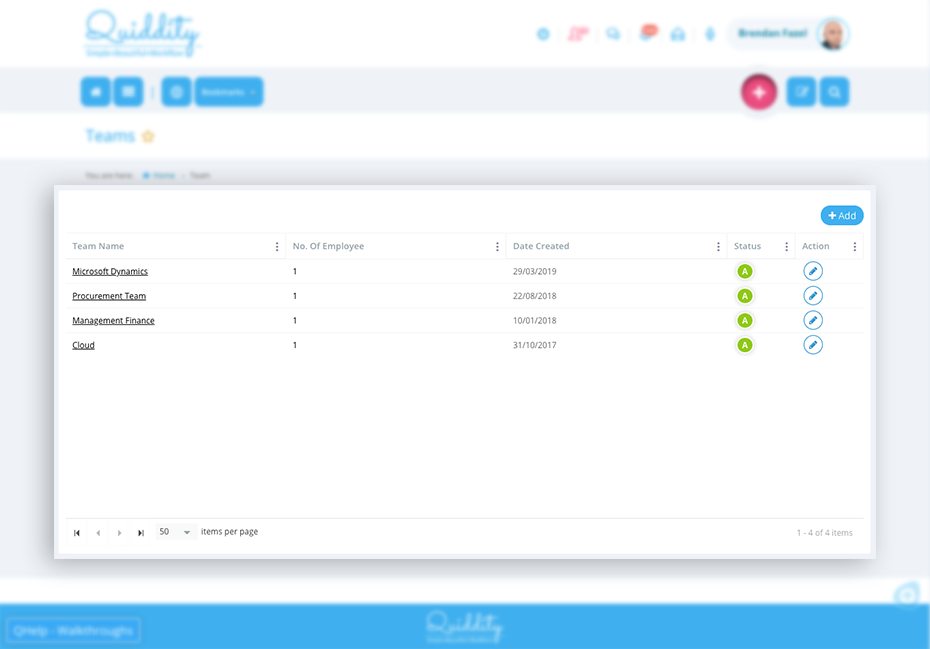
Teams
Your organisation’s team structure can exactly be followed in your CRM using Quiddity’s teams feature.
To view your teams, click on ‘Menu -> Setup -> Manage Organisation -> Team’. Click on ‘add team’ to add new teams. Active teams can be selected while adding employees. Clicking on ‘no. of employees’ will show the employees associated with the team.
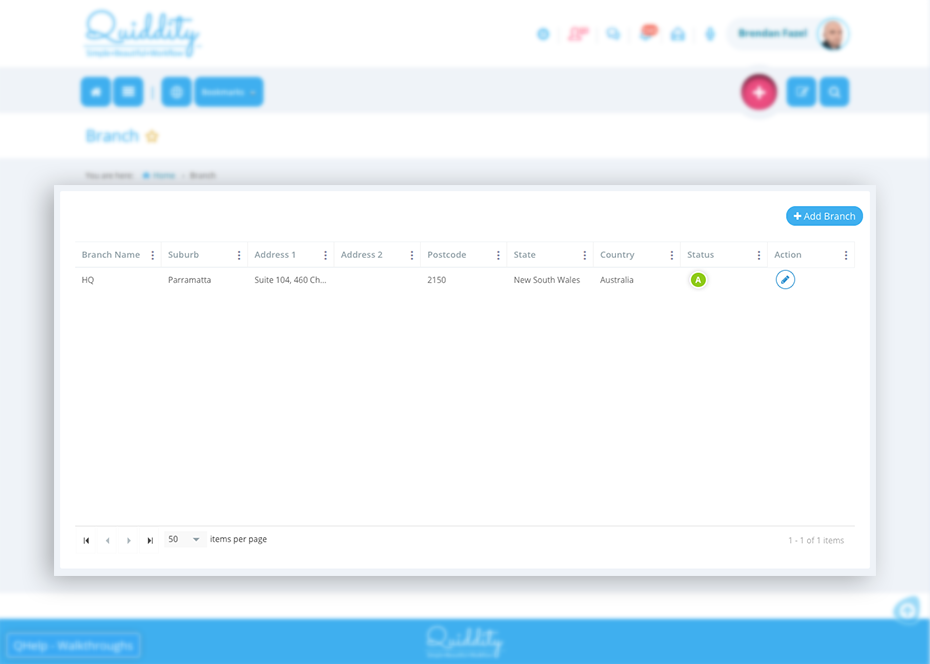
Branch
Manage your organisation branches using the branch feature of Quiddity. To add a branch, click on ‘Menu -> Setup -> Manage Organisation -> Branch’. Click on ‘Add Branch’ to add a new branch.
Employee
Your organisation employee details can be accessed in Quiddity using ‘Menu -> Setup -> Manage Organisation -> Employees’. To add an employee, click on ‘Add Employee’ button. Below are some guidelines on entering employee information.
| Field | Description |
| Personal Information | |
| First Name | Enter the first name of an employee. |
| Last Name | Enter the last name of an employee. |
| Enter the email address of an employee, which will then be used for logging into Quiddity. | |
| Shift | Select working time shift of an employee. |
| Branch | Select working branch of an employee. |
| Job Title | Select job title of an employee. |
| Team | Select team of an employee. |
| Skills | Select multiple skills of an employee. |
| Microsoft Connector ID | Add Microsoft teams webhook id. |
| Contact Details | |
| Phone | Enter phone number of an employee. |
| Mobile | Enter mobile number of an employee. |
| Fax Number | Enter fax number of an employee. |
| Communication Address | |
| Address line 1 | Enter address information of an employee. |
| Address line 2 | |
| Suburb/ Town/ City | |
| State/ Province | |
| Country | |
| Postal/ ZIP Code | |
| Emergency Contact Details | |
| Name | Enter emergency contact details of an employee. |
| Phone Number | |
| Add More | Click on add more to add more emergency contact details of an employee. |
| Social Profile | |
| Enter social account information of an employee. | |
| You Tube | |
| Skype |
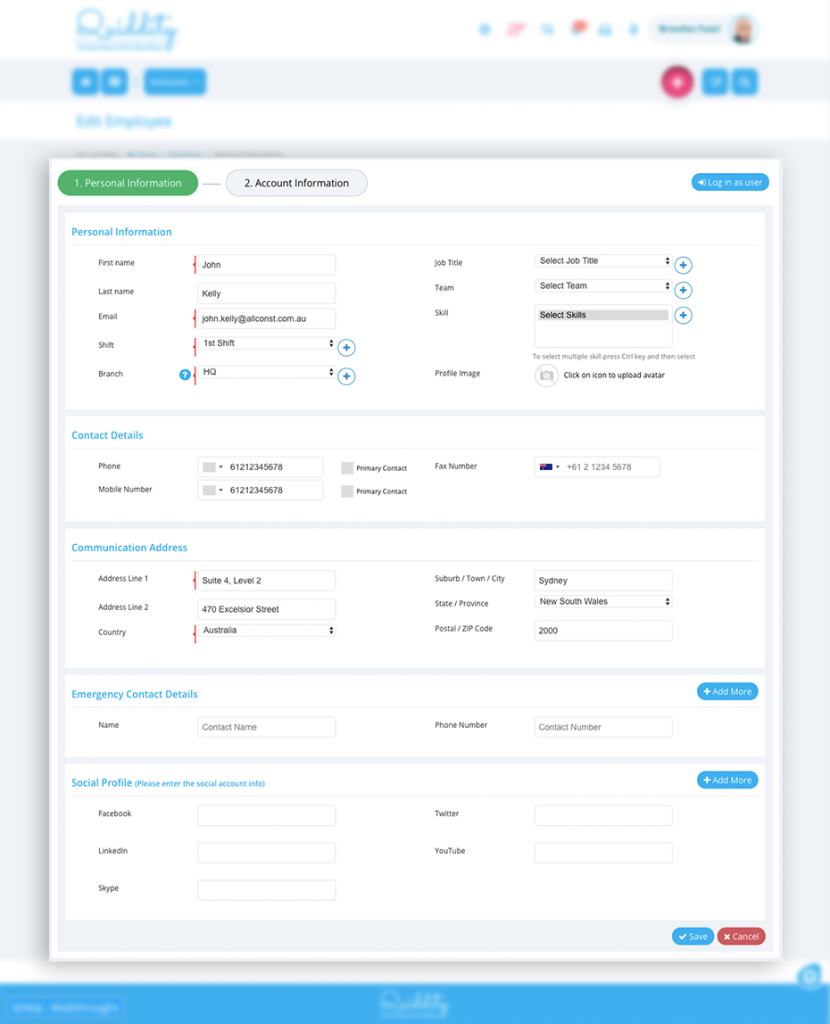
Click on ‘Save’ to add this employee and then add the ‘Account Information’ details to give them Quiddity access rights (using permission field) and assign license (to access Quiddity organisation). You can also give the emplyoees the admin rights. Click on permission to view its details – remove this.
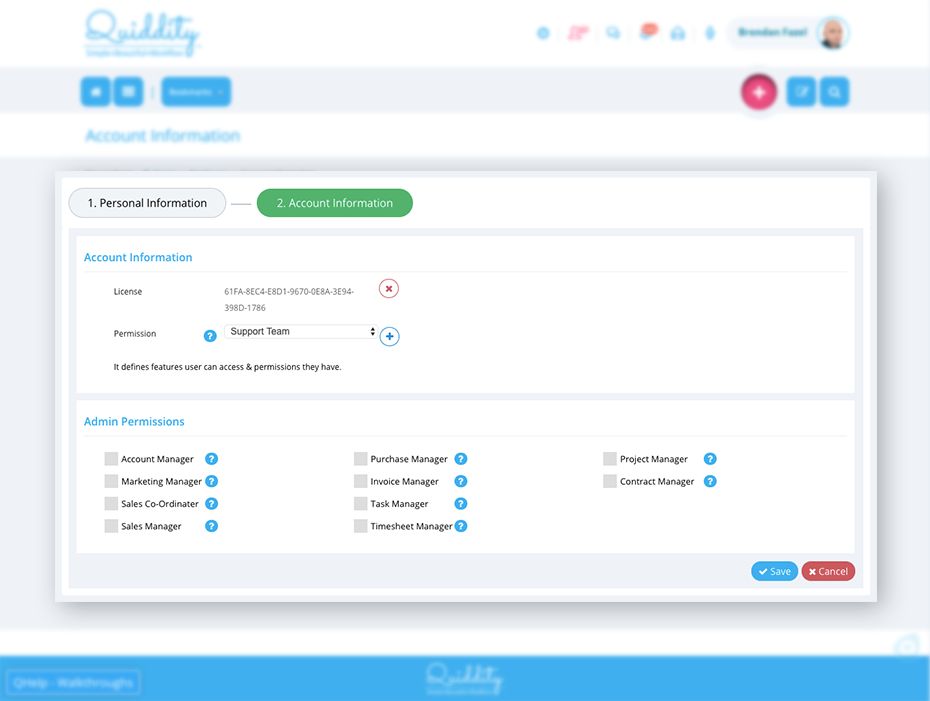
Permission
Quiddity uses the concept of permission to give your employees the access rights of different entties in Quiddity. You can assign permission to an employee by clicking on ‘Menu -> Setup -> Manage Organisation -> Employees -> Edit/add Employee -> Account Information/Next’ or through the last step of adding/editing the permission.
-
Subscription Owner
The employee who has performed the initial sign up of the Quiddity account is known as the ‘Subscirption Owner’ in Quiddity. They have access to all the features in Quiddity.
NOTE: This is a non-editable permission of Quiddity and has access to all the features of Quiddity. The newly created features will also be automatically assigned to the employees having access to this permission. -
Permission
You can create permissions to assign it to your employees and make sure they are given the required access rights.
NOTE: Upon signup, Quiddity creates permission for ‘Marketing Team’, ‘Sales Team’, ‘Procurement Team’, ‘Development Team’, ‘Finance Team’, ‘HR Team’, ‘Support Team’ and ‘Service Delivery Team’. You can edit these permissions to manage your business needs or create a new one by clicking on ‘Add’.
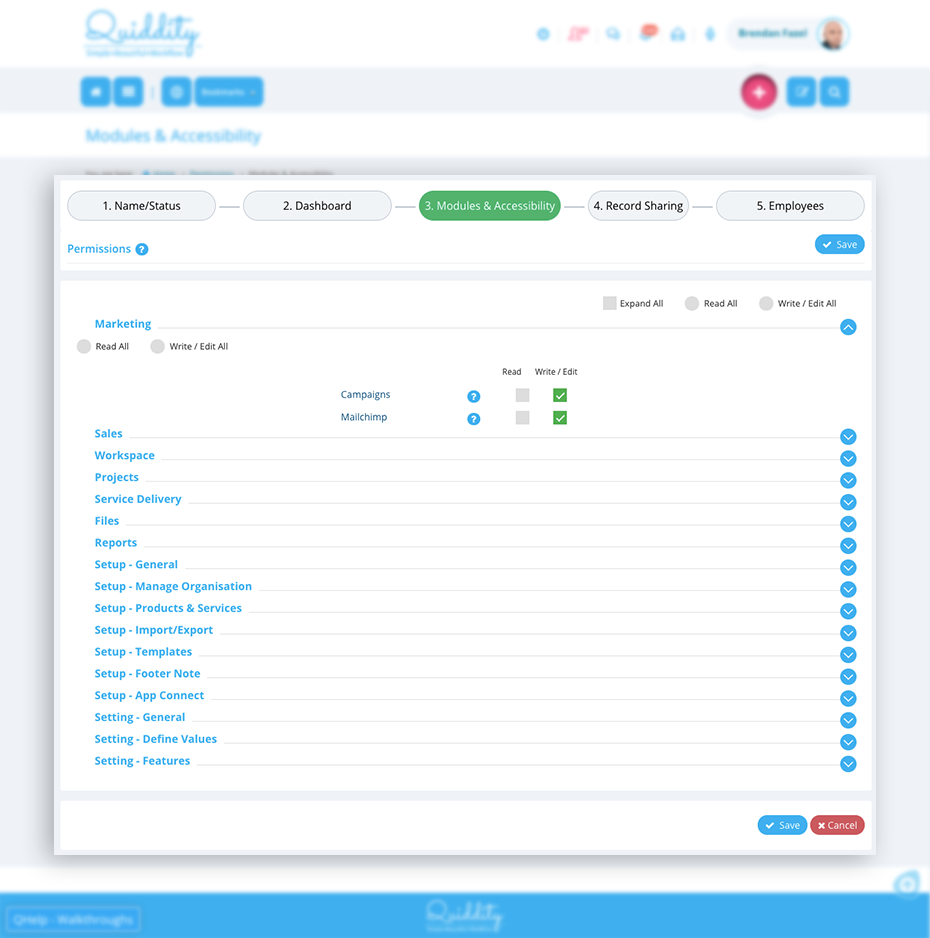
Adding/editing a permission is divided into 5 simple steps:- Name/statues
Enter an appropriate name for the permission and mark its status as active or inactive. - Dashboard
Select an appropriate dashboard widgets which can be access by the employees who have this permission - Modules & Accessibility
Select read/write access for Quiddity entities. The entities in this section are easily managed based on Quiddity menu. You can assign read/write access for the features in Quiddity. The employees will have assigned read or write permission to any feature/module of Quiddity. - Record Sharing
You can select Quiddity entity as public or private within Quiddity.
Public: If the entity is public within the organisation, records created by them can be viewed/edited by employees who have public rights. Their list will have all the records created within the organisation.
For example: Tom is in Sales department and lead is defined as Public and Sara is in Marketing department and lead is defined as private. Lead created by Tom, can be viewed or edited by lead defined by Sara, but lead created by Sara cannot be viewed or edited by Tom.
Private: If the entity is private within the organisation, it can be viewed/edited by employees if shared to them.
For example: Tom is of Sales department and lead is defined as Public and Sara and James are of marketing department and lead is defined as Private. Lead created by Sara, can be viewed or edited by Tom, but cannot be viewed or edited by James unless shared to him. - Employees
Select employees and assign them to a newly created permission and give them specific access to Quiddity account.
- Name/statues
-
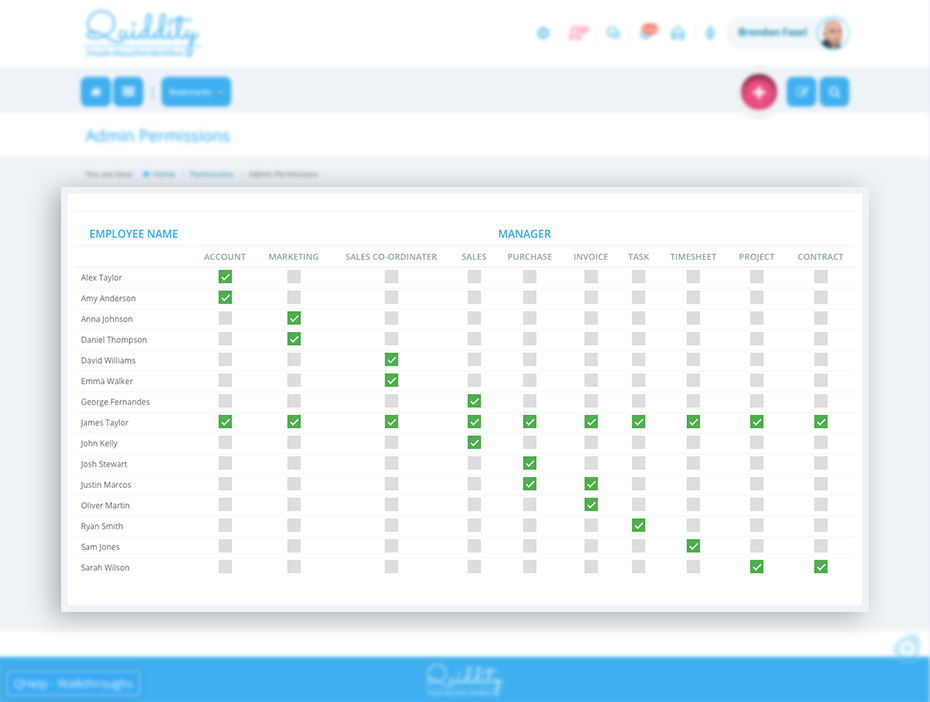
Admin Permissions
Manager permissions for all entities can be assigned to an employee using ‘Admin Permission’. To grant managerial permission to an employee, click on ‘Menu -> Setup -> Manage Organisation -> Permission -> Add Admin Permission’. You can also assign employee managerial permission from ‘Account information’ section accessed by editing/adding an employee. Below are some guidelines on updating any permission
-
Permission Description Account Manager He/she manages the relationship with the contact. They will receive the call cycle reminder. In case, manager is not setup for a contact, contact owner will receive the call cycle reminder. Marketing Manager He/she can reopen closed campaigns. Sales Co-Ordinator He/she can reopen closed leads and quotes. Sales Manager He/she can reopen closed leads, quotes and sales orders. Purchase Manager He/she can reopen closed purchase orders. Invoice Managers He/she can reopen closed invoices and schedule invoices. Task Managers He/she can reopen closed tasks. Timesheet Managers He/she can approve and reject the timesheets logged by employees. Project Managers He/she can reopen closed projects. Contract Manager He/she can reopen closed contracts.
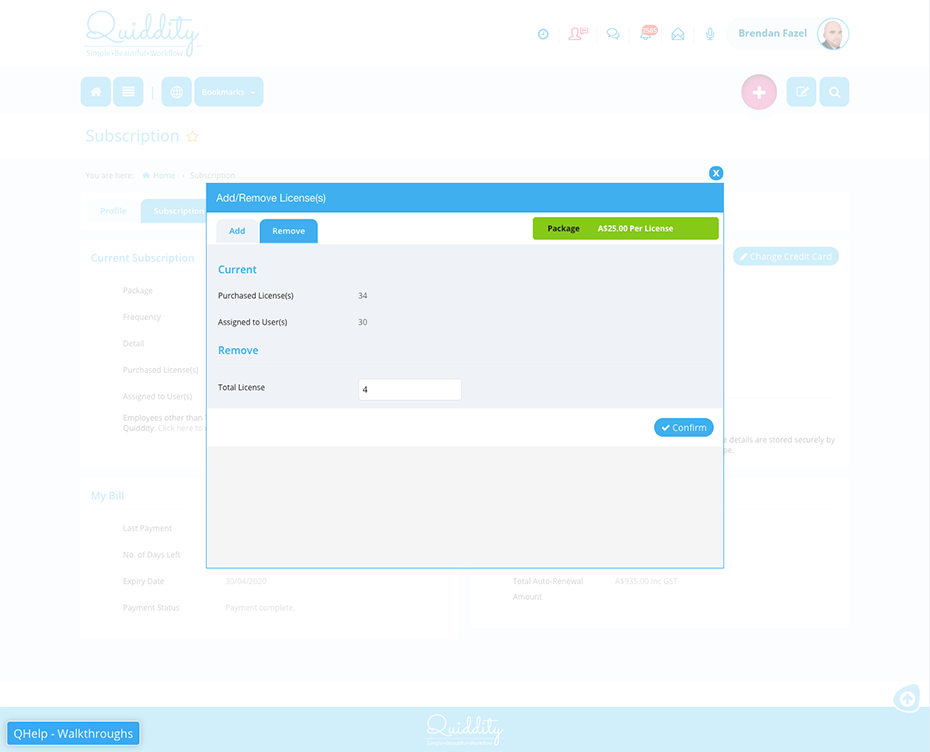
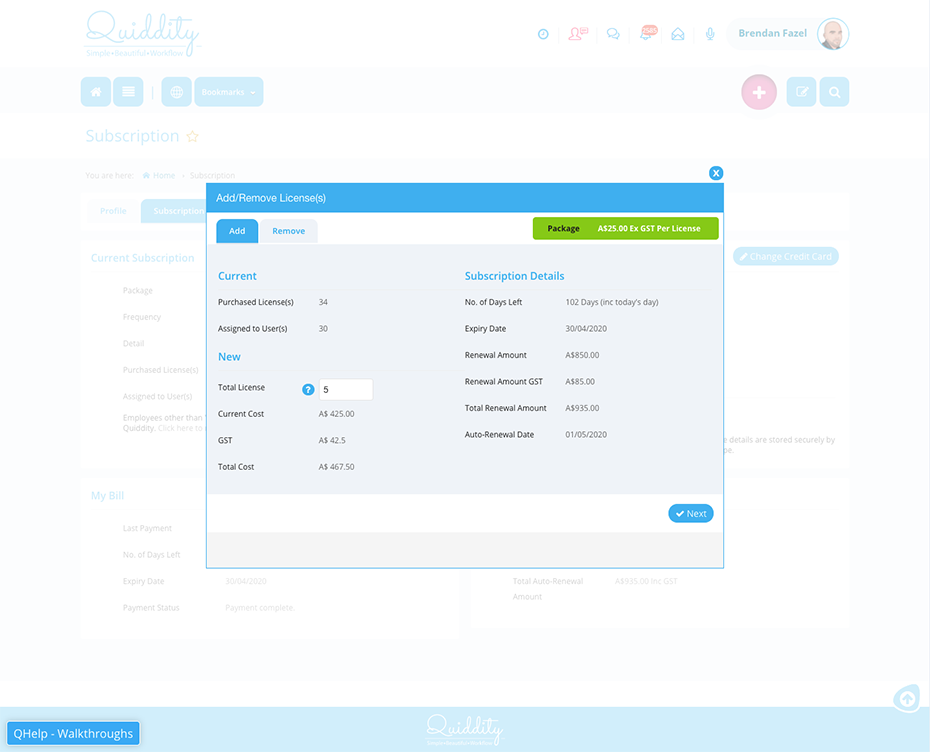
Manage licenses
Adding and removing licences in Quiddity is very easy. Simply click on ‘Menu -> Setup -> Organisation -> Subscription’, it will redirect to a page which show the subscription details. Click on ‘Add/Remove license(s) to add or remove any license.
-
Add License:
For adding any license refer to the ‘Add’ tab. Enter the no. of licenses which you want to add into your Quiddity organisation. Quiddity will calculate the ‘Renewal amount’ based on the no. of licenses requested and the no. of days for which your organisation is already subscribed. Clicking on next will automatically fetch the credit card details used by Quiddity and ask you to confirm on buying the license.
Click on ‘Confirm’ and your payment will be processed. Quiddity will charge for the new renewal amount on the next renewal date.
-
Remove License:
Click on the ‘Remove’ tab of add/remove license(s). Add the number of licenses you want to remove. Click on ‘Confirm’, Quiddity will remove the license(s) if it is unassigned to any employee. You can remove the unassigned licenses.
If the license is assigned to an employee, please remove license using ‘Menu -> Setup -> Manage Organisation -> Manage License’.