Based on the campaign’s status and your permission, action column will show ‘Edit’ or ‘View’ action.Please refer to section manage action and statuses for more details on it.
On editing a campaign, its information is nicely divided in the form of tabs.
Editing campaign details
Campaign fields can be edited from the ‘Campaign Details’ tab. Based on the start date and end date of the campaign, Quiddity checks the campaign status and notifies you to change it. When the campaign reaches its start date and if its status is not Running, Quiddity will prompt a message like “Today is the campaigns start date and selected status is Planning. Please change the status to Running or start date to future date to create its leads.”Similarly, when the campaign crosses end date and status is planning or running, it will prompt messages to users like “The campaign has already crossed its end date and the status is still Planning. Please update its status to record the final data.”
Activity records of a campaign
Quiddity logs change in the campaign along with its flag under the activity records tab.
Add contacts to a campaign
You can add contacts to a campaign in two ways.
-
Add contact while editing a campaign
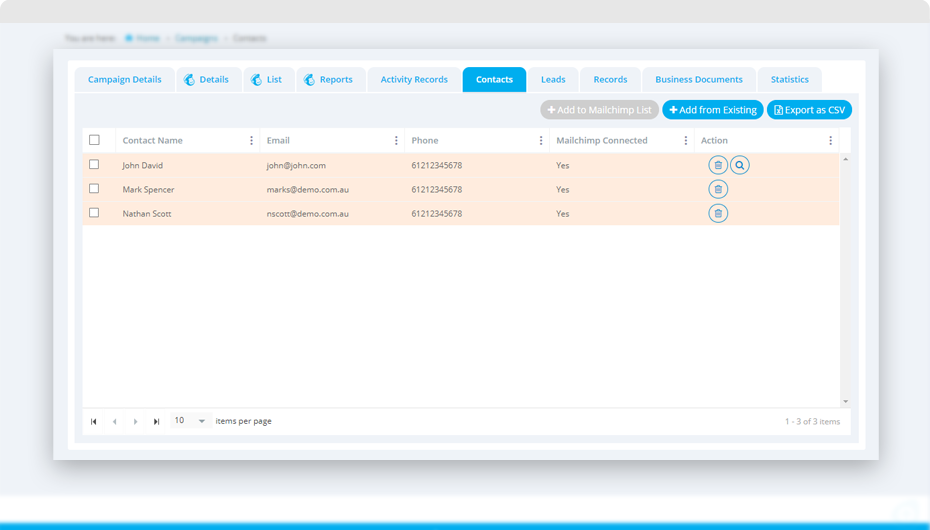
- Click on the ‘Contact’ tab and manage all contact associated with this campaign using this section. Click on ‘Add from Existing’ button.
- This option will allow you to add Quiddity contact into the campaign. Adding contact from Quiddity contact will automatically add its associated tags.
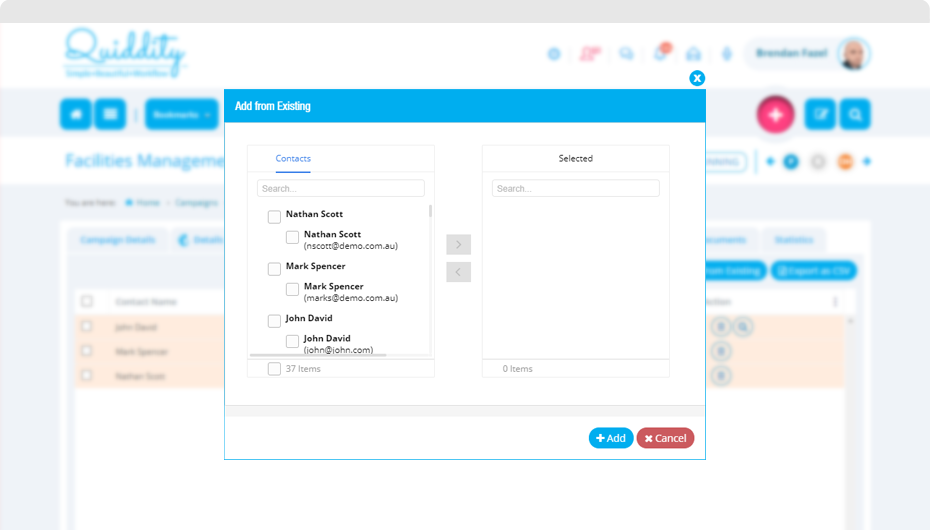
- In the above screen, the left side contact tab will display all Quiddity’s contact with the company’s primary email its contact person’s email. You can search these contacts based on names and select the required contacts. The selected contacts will be displayed under the ‘selected tab’ and clicking on ‘Add’ button will add all selected contact to ‘contact list’ of the campaign. You can remove contacts by clicking the ‘Delete’ button on Action Column.
-
Add a contact from the contact list
- Click on ‘Menu -> Sales -> Contacts’
- The contact list has multiple options to filter the contacts.
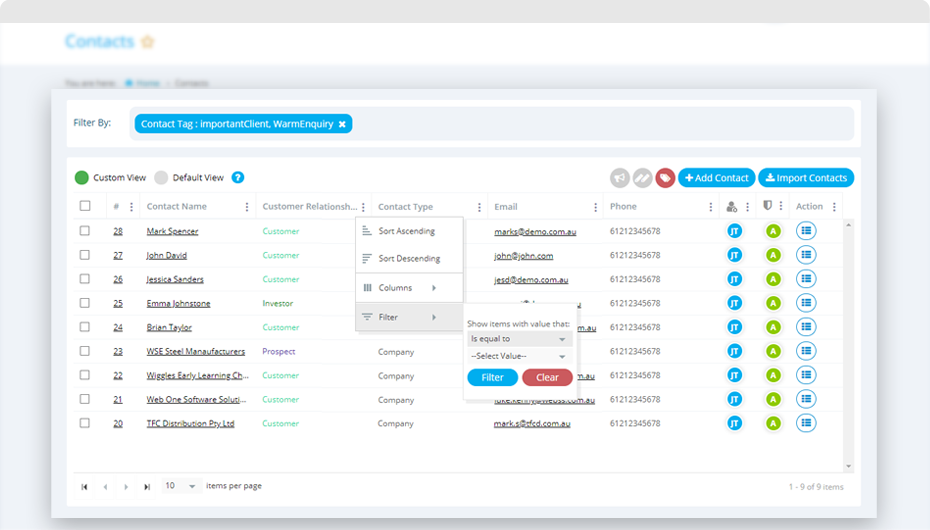
- Perform the required search for the contacts and select the required contacts.
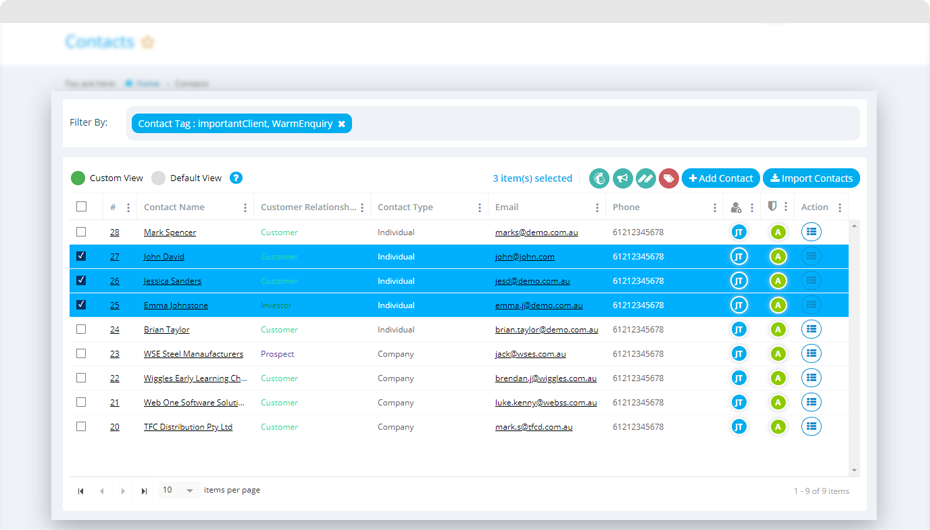
- After selecting the required contacts, click on ‘Add to campaign’
 .This will give the list of all Quiddity campaigns and a simple option to add it to your campaign’s contact list.
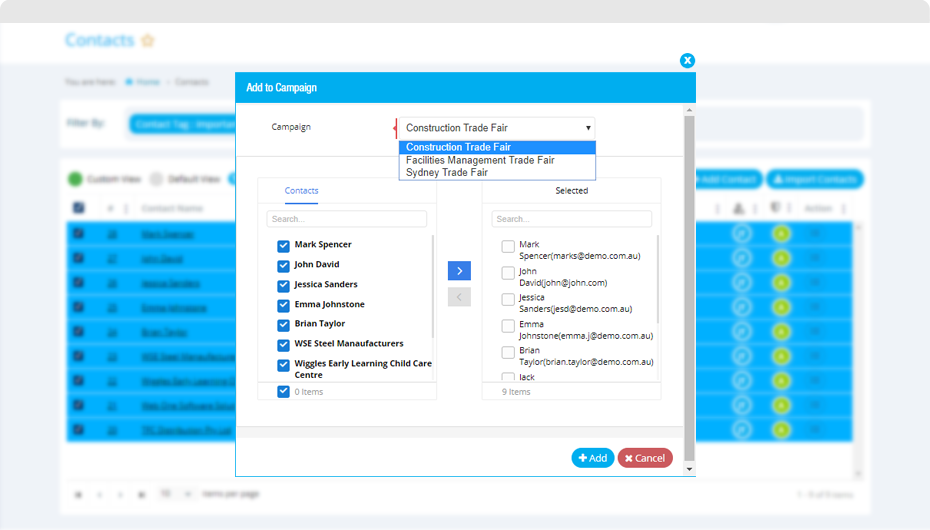
- Confirm the selected contacts by clicking on ‘Add’ button and your contacts are added in the selected Campaign.
Export contacts as CSV
Click on the contact tab of a campaign. There is a button to export all the contacts in a CSV file. ‘Export as CSV’ will allow you to download a list of all contacts associated with this campaign into CSV format. In case your organisation doesn’t use MailChimp, you have the option to download list of contact and upload to your email campaign management system.
Add leads to a campaign
Click on the lead tab of the campaign. Quiddity allows you to manage your sales pipeline for the campaign using this section. This section will list all Leads associated with this campaign. You can create a lead from this screen by clicking on the ‘Add Lead’ button. Edit button under Action column of the grid allows you to edit leads directly from this screen. You can create Quote, Sales Order or Invoice from lead using Action button against each lead. 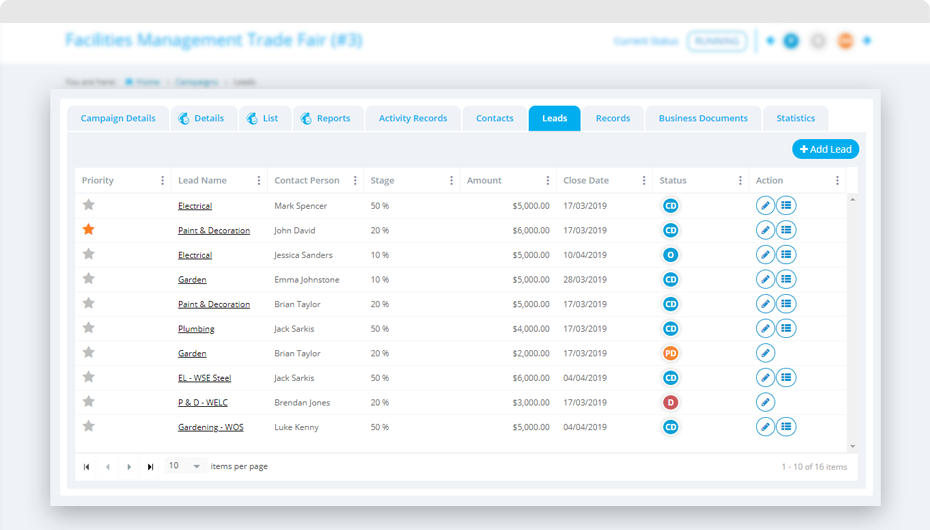
View records associated with a campaign
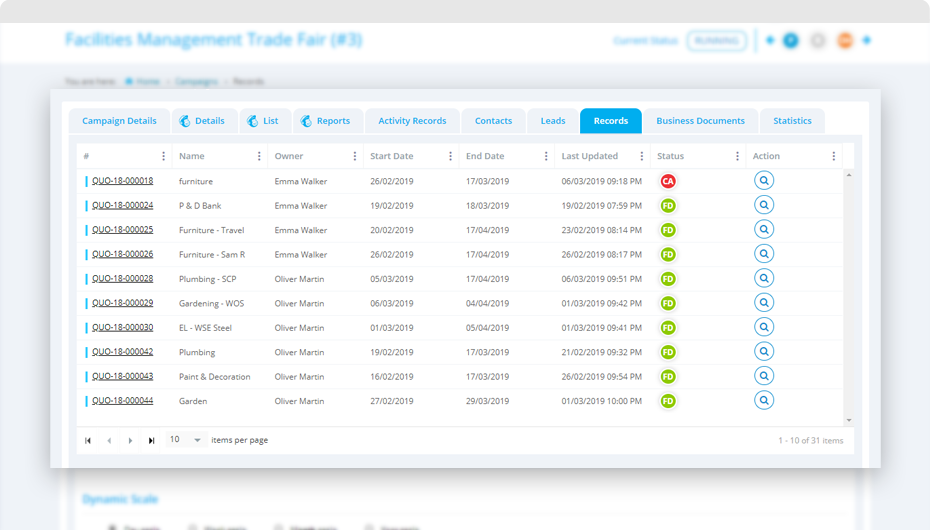
Quiddity manages complete workflow. The entry point of workflow starts from the campaign which flows towards Leads, Quotes, conversion to Sales Order or Invoice. You can view all associated other entity of workflow like Quotes,Sales Order and Invoices using ‘Records’ tab while editing a campaign
Add/View business documents to a campaign
You can attach multiple documents and manage it within the campaign using the ‘Business Document’ tab while editing a campaign
View campaign’s statistics
The ‘Statistics’ tab while editing a campaign will give you a complete over view of your campaign. As Quiddity manages the workflow from campaign to invoice, it gives the number of records as well as amount created for it.
It gives the budgeted v/s actual revenue, expected leads v/s actual leads, lead status, cost per lead and all the information related to the campaign.


