Based on your permission, the action status will show ‘Edit’ or ‘View’ action. On editing an enquiry, its information is nicely divided in the form of tabs.
Editing enquiry details
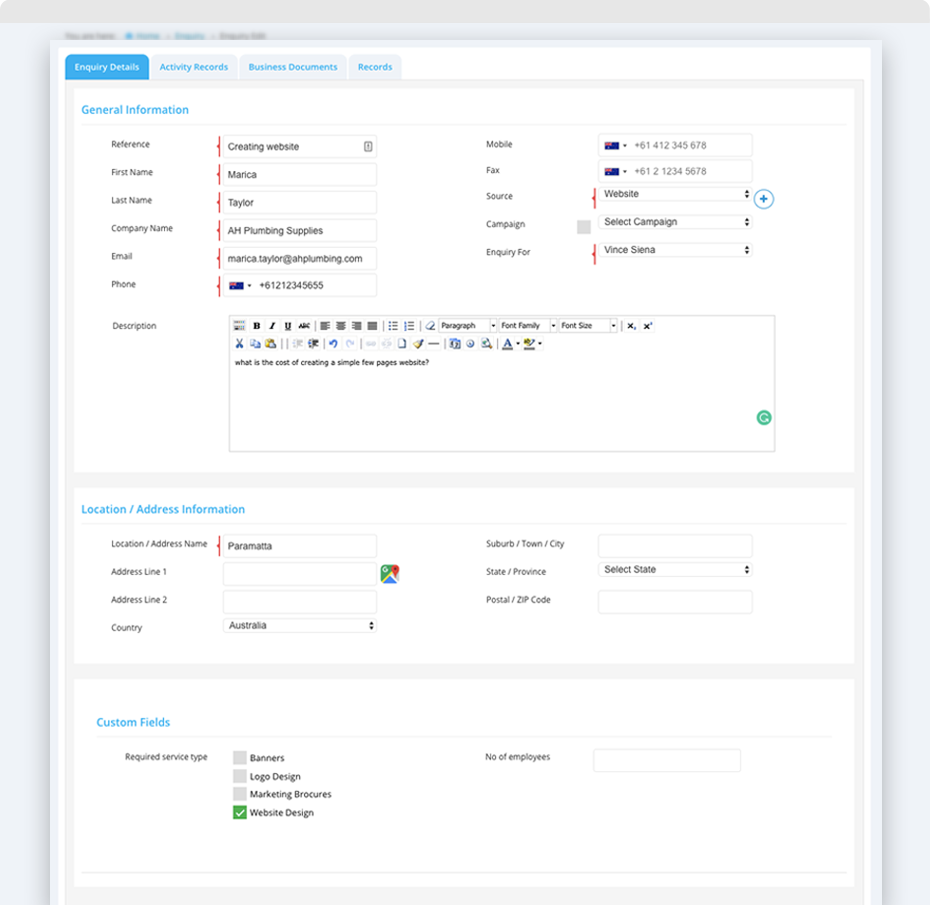
Enquiry fields and custom-defined fields can be edited from the enquiry details tab. Please refer to section ‘Enquiry fields’ to know more details on fields.
Activity records of enquiry
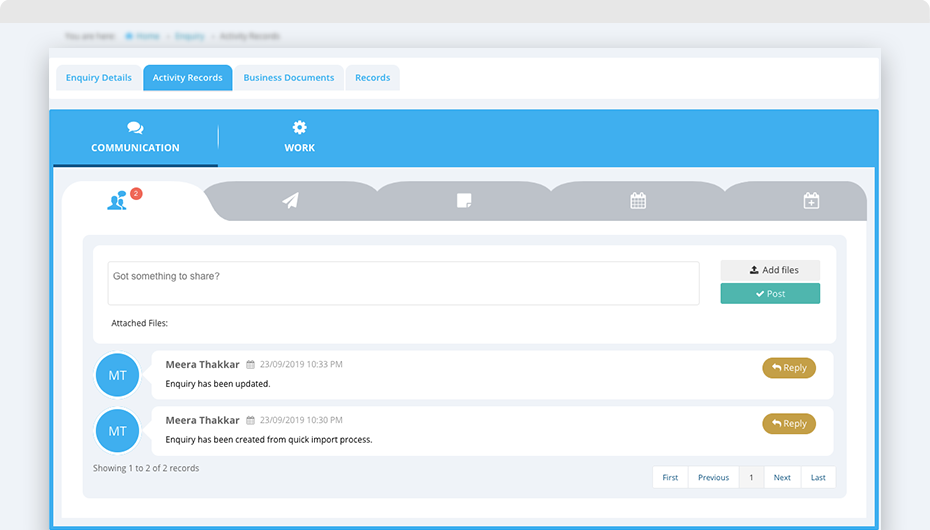
Activity records are divided into ‘Communication’ & ‘Work’ log.
Communication log
This helps in keeping the track of the communication done for the particular enquiry.
-
Action
- Any change in the record is logged under this tab.
- You can also add your file and some comment under this tab.
- Add your comment in ‘Got something to share’, attach files through ‘add files’ and click on post share your thoughts.
- Your teammates can reply to your thoughts by simply clicking on the ‘Reply’ button.
-
Emails
- You can send emails to any contact using this functionality.
- This email will be associated to the record.
- Click on ‘Send Email’ and fill in the required details and click on ‘send email’ to send the email.
-
Note
- You can add, edit and delete any note for the record.
- Click on add note; enter the required ‘Subject’ and ‘Description’ and click on ‘Add’ to add the note for the record.
- Click on ‘Edit’ or ‘Delete’ to perform the required action.
- To view the deleted notes, click on ‘Show Deleted Notes’.
-
Meeting
- Click on ‘Meeting’ to add meeting with the record associated person.
- Enter the ‘Subject’, ‘Attendees’, ‘Location’, ‘Date’, ‘Start Time’, ‘Duration’, ‘Reminder’ and ‘Description’ and click on ‘Send’ button.
- The attendees will receive an ICS file which can be easily downloaded in their calendar.
-
Reminder
- Set the email or in-app reminder for the record and don’t miss on the record.
- To add the reminder,
- 1. Enter the subject and its detail.
- 2. Enter the repetition to ‘Daily’, ‘Weekly’ (select days), ‘Monthly’ (select date) and ‘Specific Date’ (one time, select date) for the reminder.
- 3. Select the time and the notification time and click on send.
- 4. You will receive an email or an in-app notification based on the selected notification type for the reminder.
- 5. You can even ‘snooze’ the in-app notification reminder.
- Click on ‘bell icon’ to view in-app reminder.
- You will get an option to ‘dismiss’ or ‘snooze’ the reminder.
- You can ‘snooze’ the reminder for 5, 10, 15 and 20 minutes.
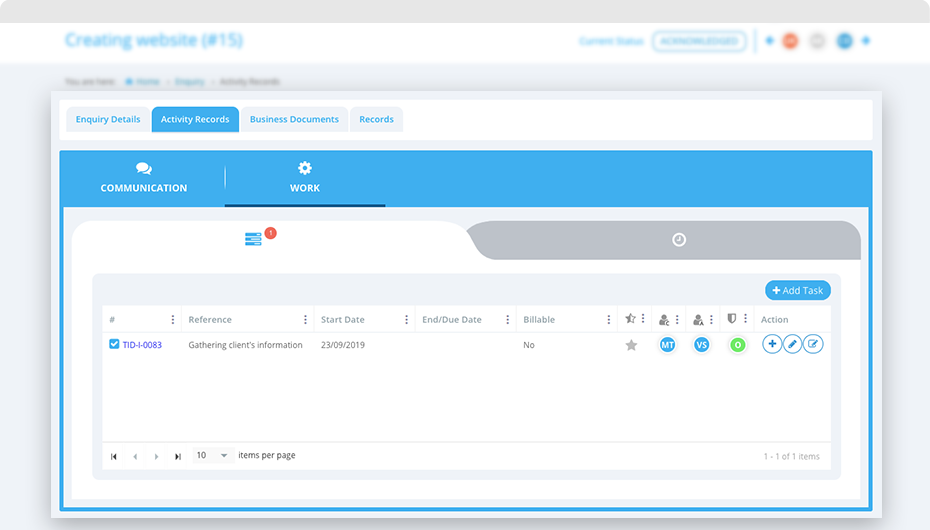
Work log
This helps in keeping the track of the work i.e. any task or time spent for the particular enquiry.
-
Task
- You can add, edit and add sub-task for any task associated with the record.
- Click on ‘Add Task’, ‘+’, to add a sub-task or ‘edit’ to perform the desired action.
-
Timesheet
- You can easily add, edit and view the time-spent for against the record.
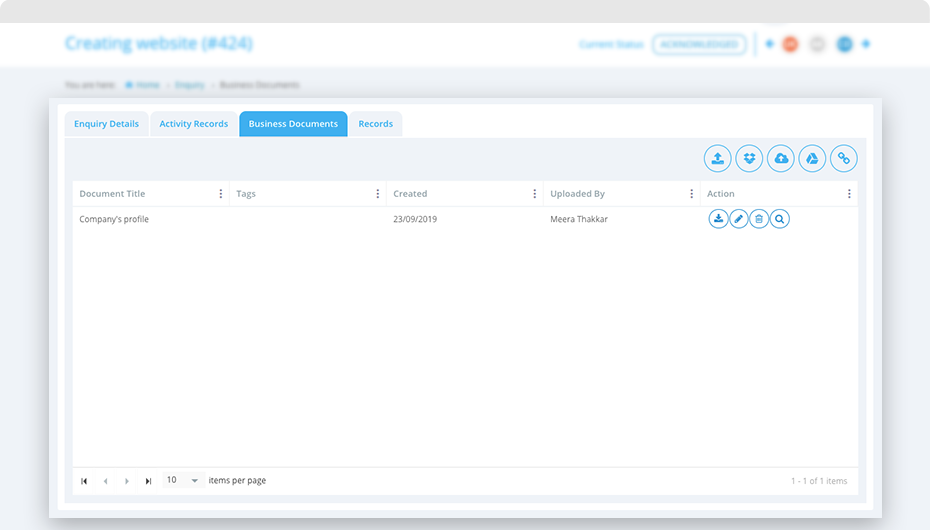
Add/view business documents to an enquiry
You can attach multiple documents and manage it within the campaign using the ‘Business Document’ tab while editing a campaign.
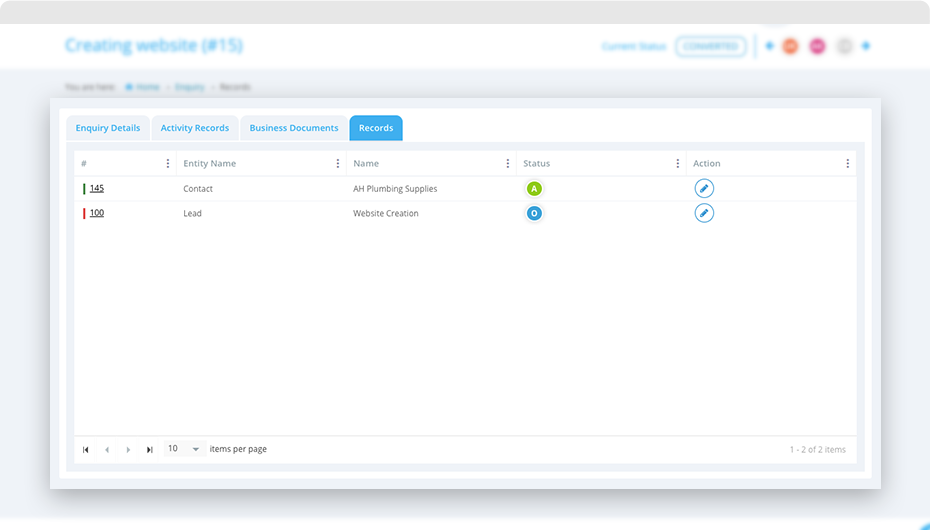
View records associated with an enquiry
The enquiry is the sales signal for your business. Once the enquiry is converted to a contact or lead, it is accessible from this tab.
Create a contact for an enquiry
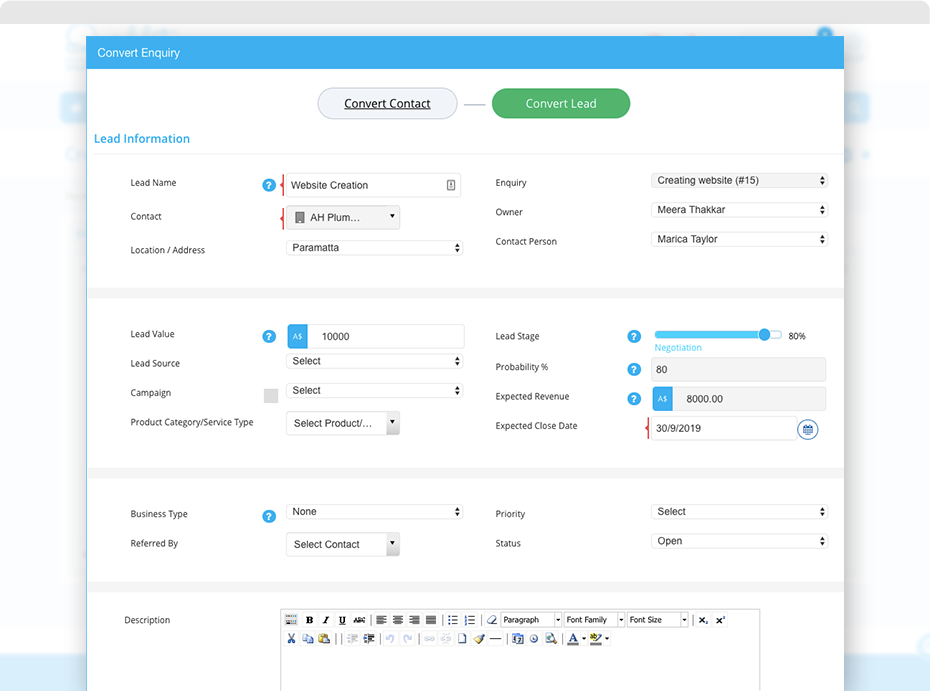
You can create the contact and/or the lead when you change the enquiry status to ‘Converted’.1. The enquiry filled in values will be auto-populated while creating contact. 2. Fill in the other details of the contact and click on ‘Save & Close’ if you want to create a contact only. 3. If you want to create the lead for an enquiry, click on ‘Save & Continue’. 4. The newly created contact will auto-populate while creating the lead. 5. Fill in the other details of the lead and click on ‘Save’. The enquiry is now converted to contact and/or lead and its associated records are now visible in ‘Records’ tab of an enquiry.
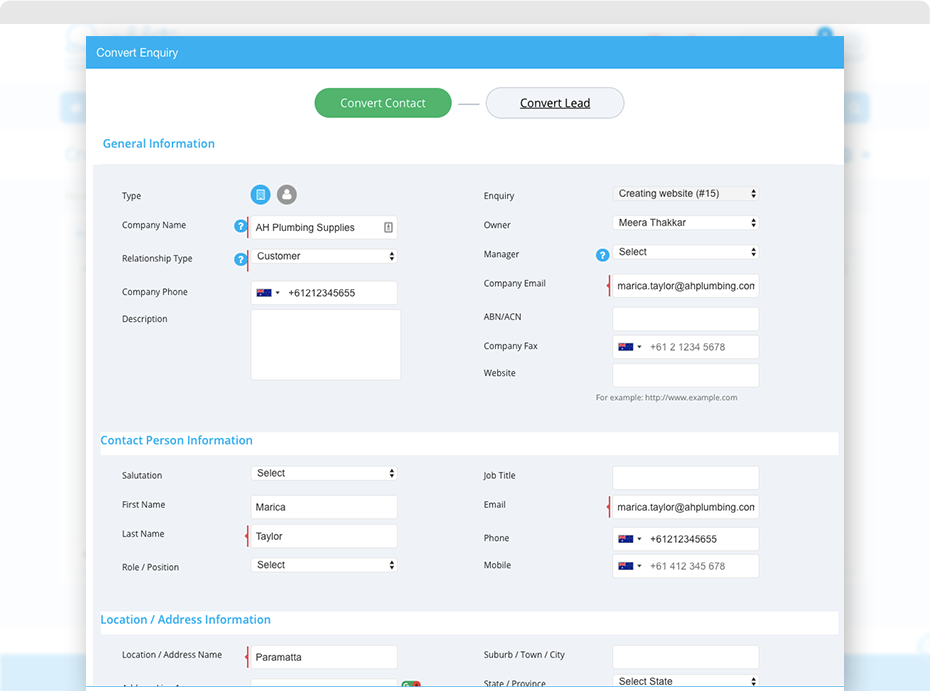
Create a lead for an enquiry
If an existing contact of your business posts an enquiry, then while converting the enquiry you don’t want to add its contact and just create its lead. In this case, while changing the status of an enquiry, click on ‘Convert Lead’. Select the existing contact and fill in the lead details and click on ‘Save’. The enquiry is now converted to a lead and associated to an existing contact. This lead will now be visible in the ‘Records’ tab of an enquiry.