You can now automatically create contacts or enquiry in Quiddity using the webforms.
1. To add your webform, click on ‘Menu -> Setting -> Feature -> Webform -> Add Webfrom button’.
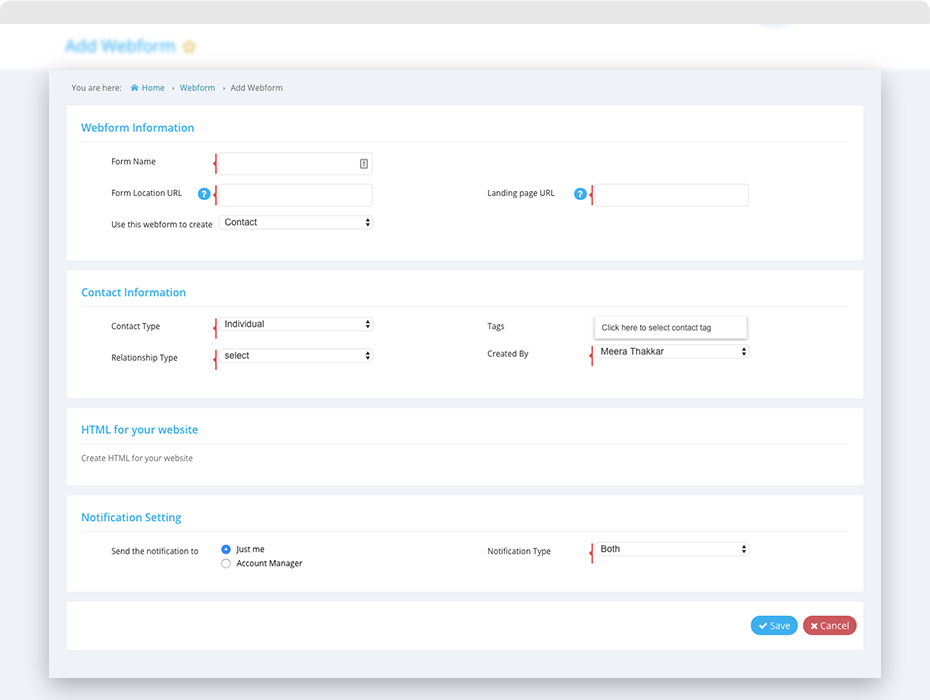
2. In the webform builder, enter the following details:
Webform information:
Enter the webform details such as form name, form location URL, landing page URL.
Select the entity you want to create on webform submission.
NOTE: If the domain name in the Location URL does not match with the URL where the web form is hosted, then the information will not be captured.
Entity Information:
Set the default values for the selected entity.
Create HTML for your website:
Click on ‘Create the HTML for your website’ to open form generator window. Click on ‘HTML form Generator’ for its details.
Copy the HTML code through ‘Copy HTML’ and paste it on your website. You can customise the generated HTML code to your liking. (If you use Google Sites you will need to add line breaks between the textarea and /textarea tags in the generated HTML when entering it into the Google Sites Editor.)
Notification Setting:
Choose the notification option and send an email or in-app notification to the selected person. Quiddity will send a notification email to the people you select each time a new contact or enquiry is created via the form.
Click on ‘Save’ and activate your webform setting.
Embed your HTML code to your website and get the records created in Quiddity.